June is the start of summer and PRIDE Month! We have a cool project that uses the symbol of the LGBTQ+ community – the colorful rainbow. This tutorial is also great to keep on hand if you want to do a tie dye activity at a birthday party or other get-together!
While PRIDE month is a celebration, it’s important to understand the history behind this movement.

On June 28, 1969, police raided a gay nightclub on Christopher Street in Greenwich Village, New York called The Stonewall Inn. This raid resulted in a 6-day protest and riot led by Marsha P. Johnson, a black, trans, bi-sexual woman. She helped fight for the right of the LGBTQ+ community to have a safe place to socialize and be themselves. A year later, bisexual activist Brenda Howard launched Gay Pride Week and the Christopher Street Liberation Day Parade. Cities across America followed suit and created their own parades, marches and celebrations.
With urging from gay activist Harvey Milk, who was the first openly gay elected official in the United States, to create a symbol of pride for their community, artist Gilbert Baker designed the flag which he believed proclaimed, “ This is who I am! ” The first flags were made by hand and appeared at the San Francisco Gay Freedom Day parade in 1978. When they were mass-produced, the original hot pink and turquoise stripes had to be removed due to production issues. The most common flag design we see today has these colors and meanings:
Our Tie Dye Kit contains all of the supplies needed to explore the art medium of tie dye on wearable, usable canvases! Use the below instructions to create 10designs on these items included in each kit:
We recommend using an outdoor or garage space because tie dye can be a bit messy but we promise, not as messy as you might think! If you take a few minutes to prep your space, you can keep your area tidy.
If you don’t use our ready-to-go Tie Dye Kit , here is what you’ll need to have on hand:
*already comes in our Kit!
IMPORTANT: if you don’t use Tulip® Brand’s One-Step Dye, be sure to read the instructions on the dye before you start! There are additional steps involved, including soaking fabric in water and liquid dish soap, soda ash, and salt.

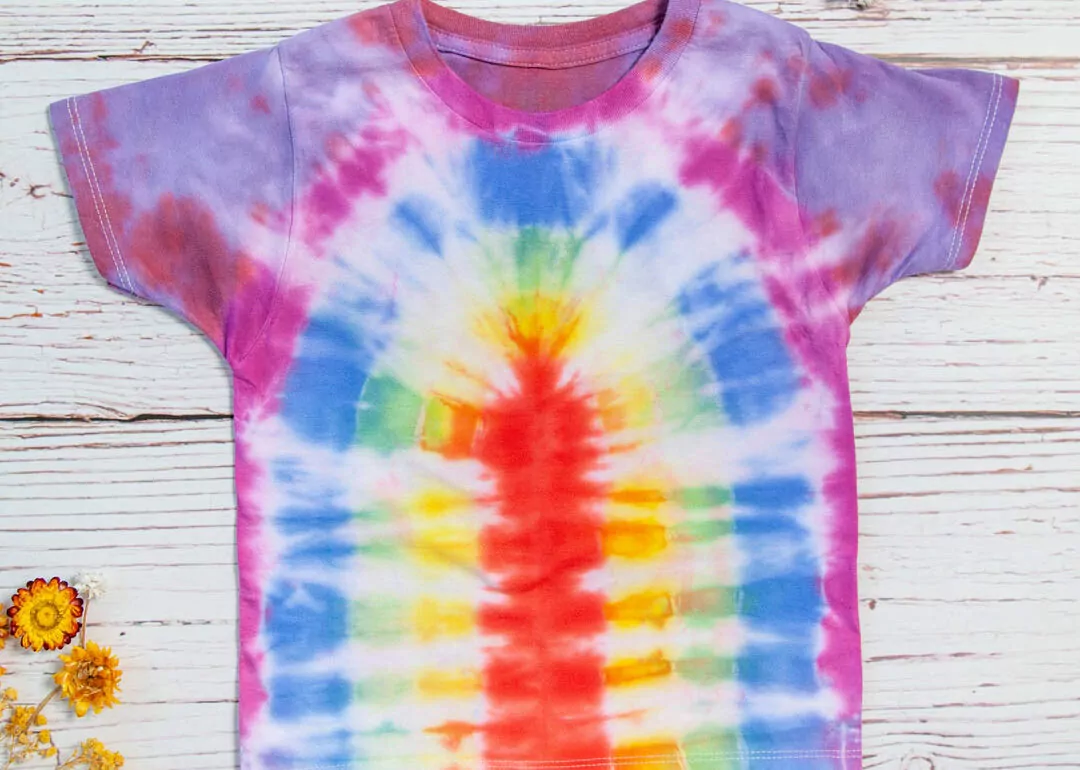
Lay the shirt out flat; fold the shirt in half lengthwise and draw 2 half rainbow arches starting on the folded edge

Begin making small accordion pleats. Follow along the drawn lines, folding the pleats so that the marker line appears straight on the top of the folds:


Secure it with a thick rubber band. Put a rubber band on the lines themselves

Continue to add rubber band sections until you have reached the end of the shirt

Place paper towels underneath your wire rack and place your banded shirt on top. Apply the dye in rainbow color order starting with red at the top of the shirt


This is the exciting part because you’re one step closer to seeing your colorful creation!
After you’ve finished dyeing, place each item in a separate, plastic storage bag or wrap it up with plastic wrap to keep the item moist while the dye sets. Choose the best storage method to prevent the different colors from making contact with one another. For example, a long, skinny mandala shirt is better off wrapped in plastic wrap like a burrito. A crumple/scrunch shirt will fit nicely into a storage bag.
Important ! Please read before you place your item in plastic bag:
Fold the edge of the bag over about 2” before putting your shirt inside so you don’t get dye on the outside of the plastic bag.
What is Dye Puddling? If you’ve applied too much dye, it can “puddle” at the bottom of the storage bag and result in a brown color. If you think you’ve applied too much dye, gently wring out to remove excess and place paper towels at the bottom of the bag.
Let your items sit overnight to absorb the dye, or follow the length of time indicated on your dye instructions. In general, the longer you let the dye sit, the more intense the color will be.
Are you ready?! Wearing gloves over your sink or tub, remove the rubber bands to reveal your cool design! Rinse each item separately under hot water until the water runs clear. If you’re rinsing multiple items, don’t stack them on top of each other or the wet dye will transfer.
It’s best to wash items right after rinsing to prevent colors from bleeding onto the white areas of your shirt. If you need to wait, lay your item flat so wet colors don’t run onto other parts of the fabric.
Wash each item individually with nothing else in the machine. Set load to Normal, Warm Water, and add a small amount of detergent.
Air drying is the best option for tie-dyed clothing. When that is not possible, use your dryer’s low or medium-heat setting to minimize fading (as well as shrinking).
Only dry the tie dye items you washed (don’t mix with other laundry) WITHOUT a dryer sheet. Single items can stick to the wall of the dryer so you can toss in a wool dryer ball or a tennis ball to ensure it dries all the way. Wash your creations separately for the next couple of washes to prevent remaining dye from staining other items.
You’re ready to celebrate PRIDE Month with a vibrant, rainbow Tie Dye craft project! If you’re interested in our handy dandy Tie DIY Kit , it ships for free! Use it as a fun, hands-on activity at your next birthday bash! We can’t wait to see your creations! Be sure to tag us @hellodragonflyfun on Instagram and Facebook and sign up for our newsletter . Get more cool DIY tutorials on our Blog!