You probably have a favorite cartoon character, superhero or video game avatar. Animated stories allow us to escape into other worlds and pretend to be someone else for a while! What if you could create YOUR OWN cartoon character where you decide what they look like, what they do, and where they live? We’ll show you the fundamentals of drawing and before you know it, you’ll be designing your own caricatures and the fantasy world they live in!
If you get hooked (we’re pretty sure you will) and want to be guided by one of our expert artists, join us for one of our Virtual Afterschool Cartooning Classes or throw a Virtual Cartooning Party with your pals!
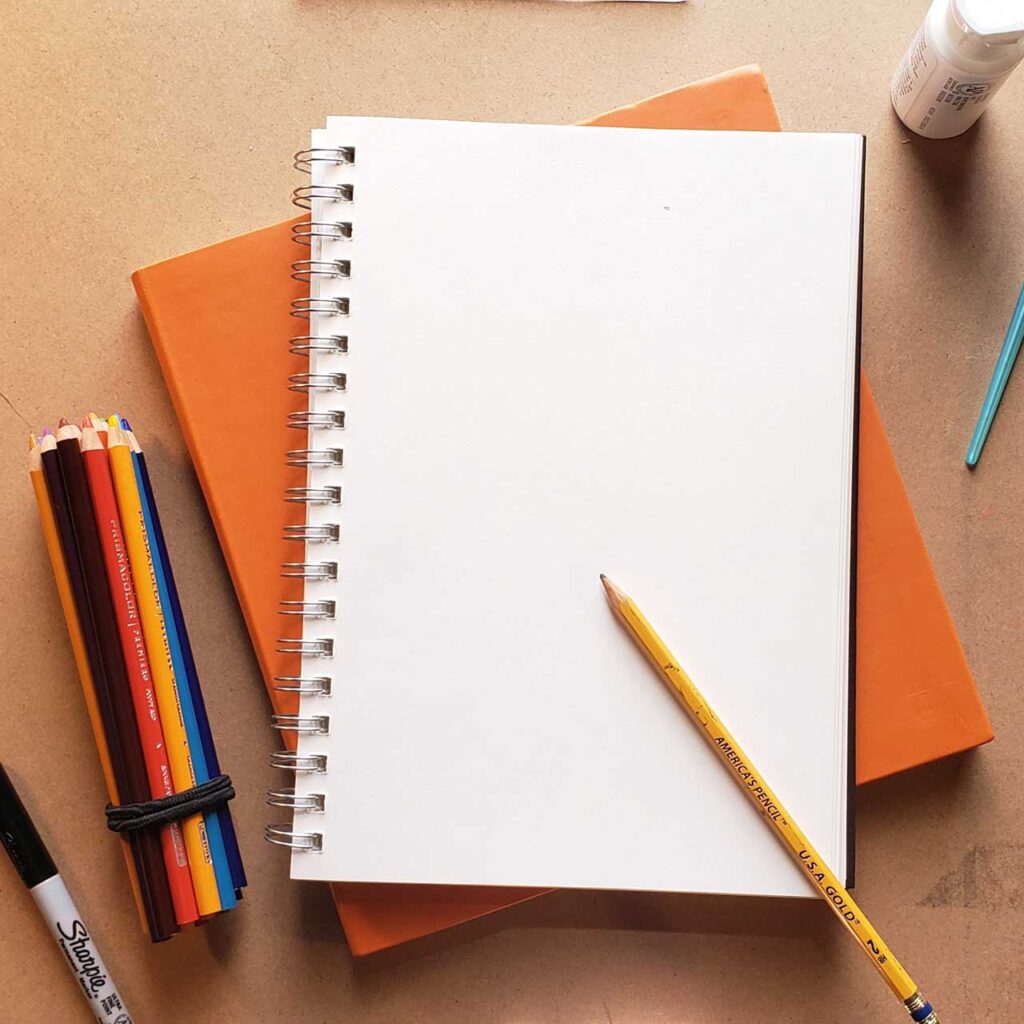
– Sketchbook or printer paper
– Pencil with eraser
– Colored pencils
– Black pen or marker
– (Optional) White acrylic paint
STEP 1: Think about what kind of character you would like to make. What will their personality be? Are they a human or a creature or a mix of both? Think about different things your character might enjoy doing or a job they might have. The more details you can decide in the beginning, the easier it will be to design the way they look and the clothes they wear. In this stage you can also come up a with a cool name.
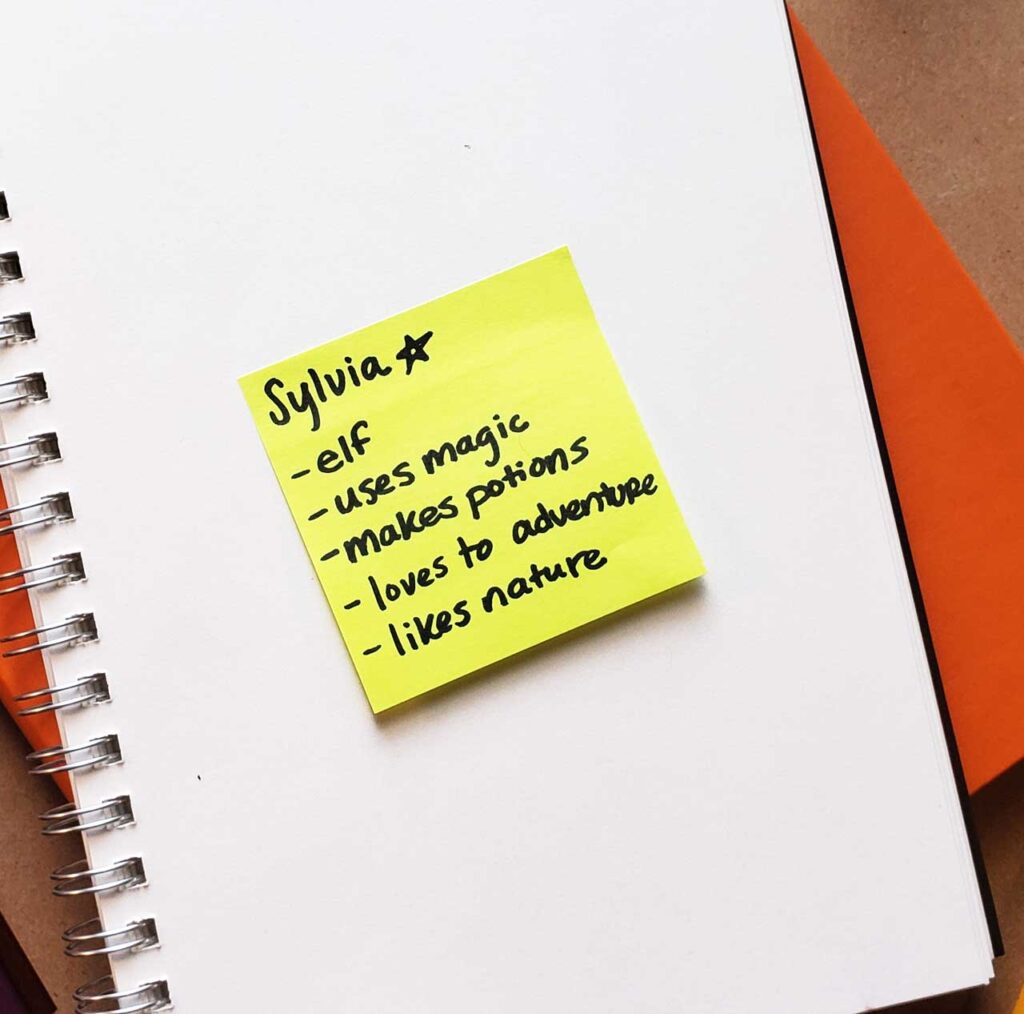
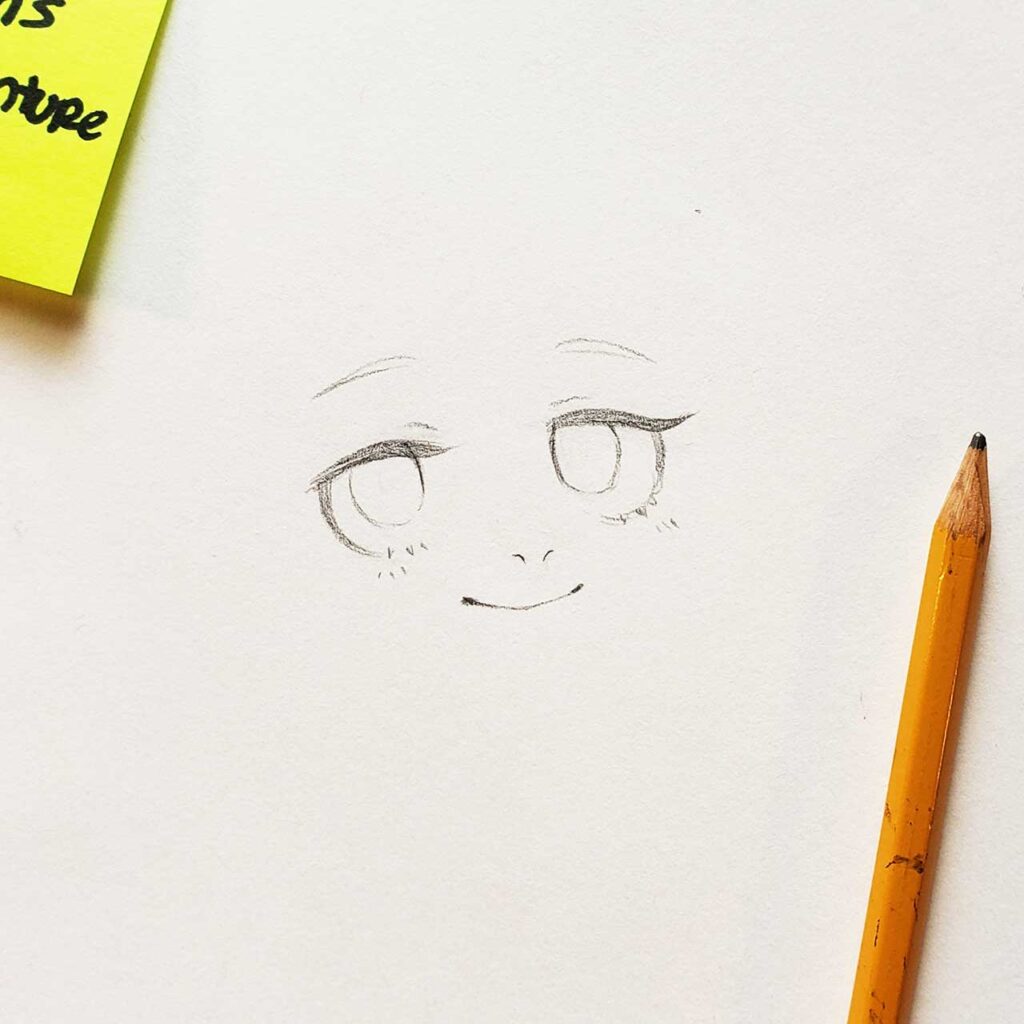
STEP 2: While thinking about their personality. create your character’s face. You can use your pencil to draw this on your paper, but be extra careful to draw very lightly since all of these pencil marks will be erased. If you decide your character is shy or gentle, they might have more tired or soft eyes. If you decide your character is more outgoing and brave, they might have more aggressive-looking eyes. The same goes for facial expression. Think about what face you would make if you were pretending to be your character. Maybe a smile, a frown, or an angry expression would be suitable for their personality. I decided to give mine more gentle and rounded eyes because I imagine she has a sweet personality. To finish it off I gave her a slight smile and some small nostrils for her nose.
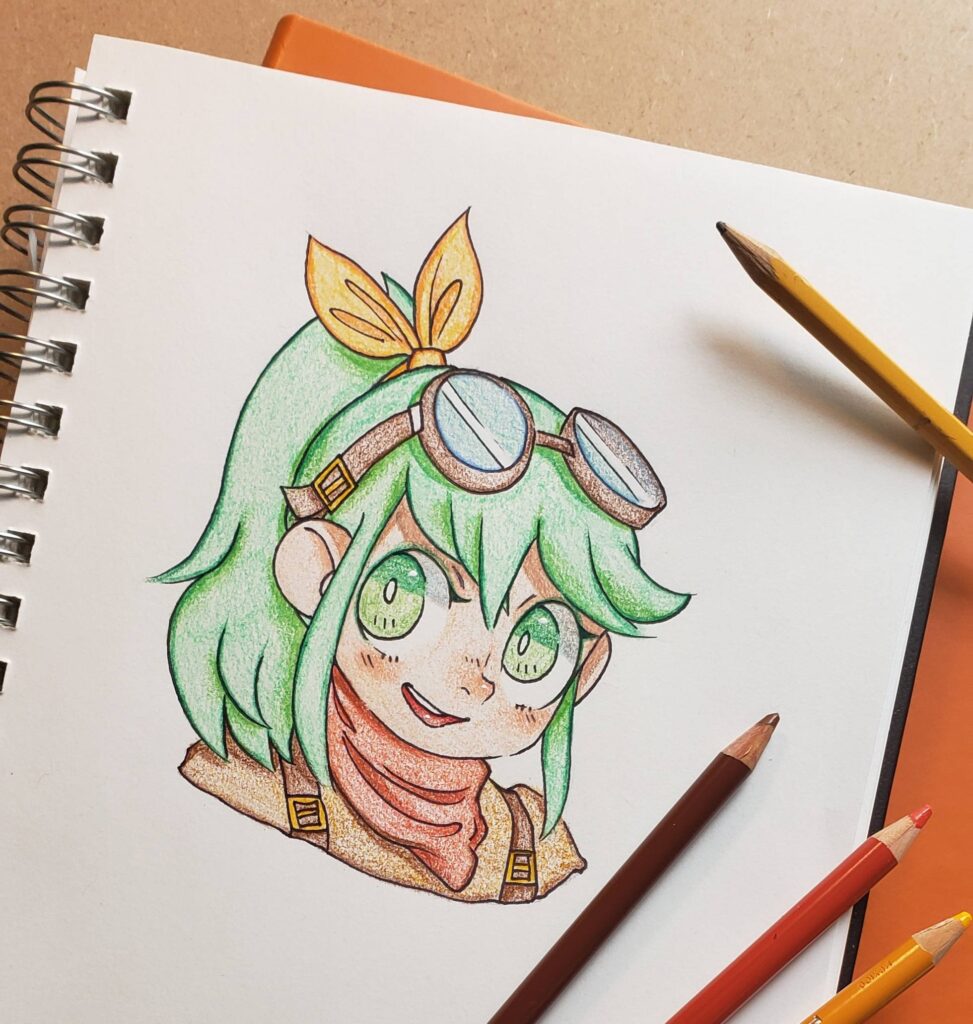
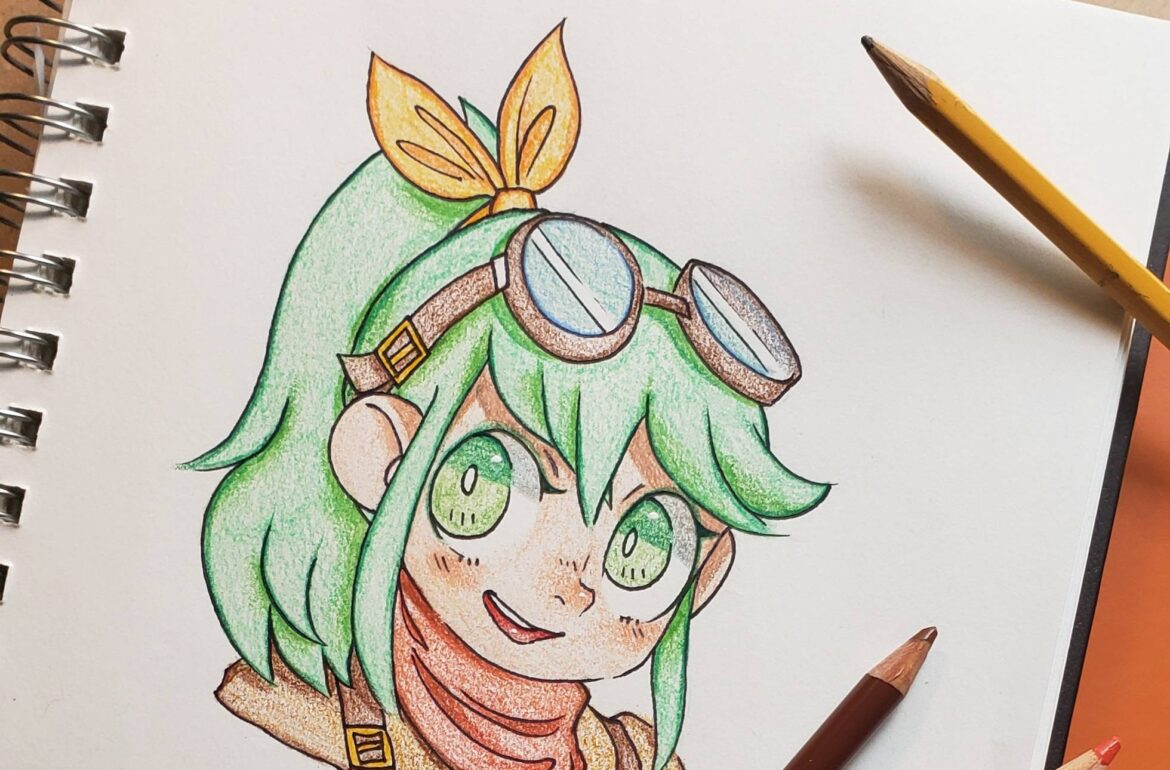
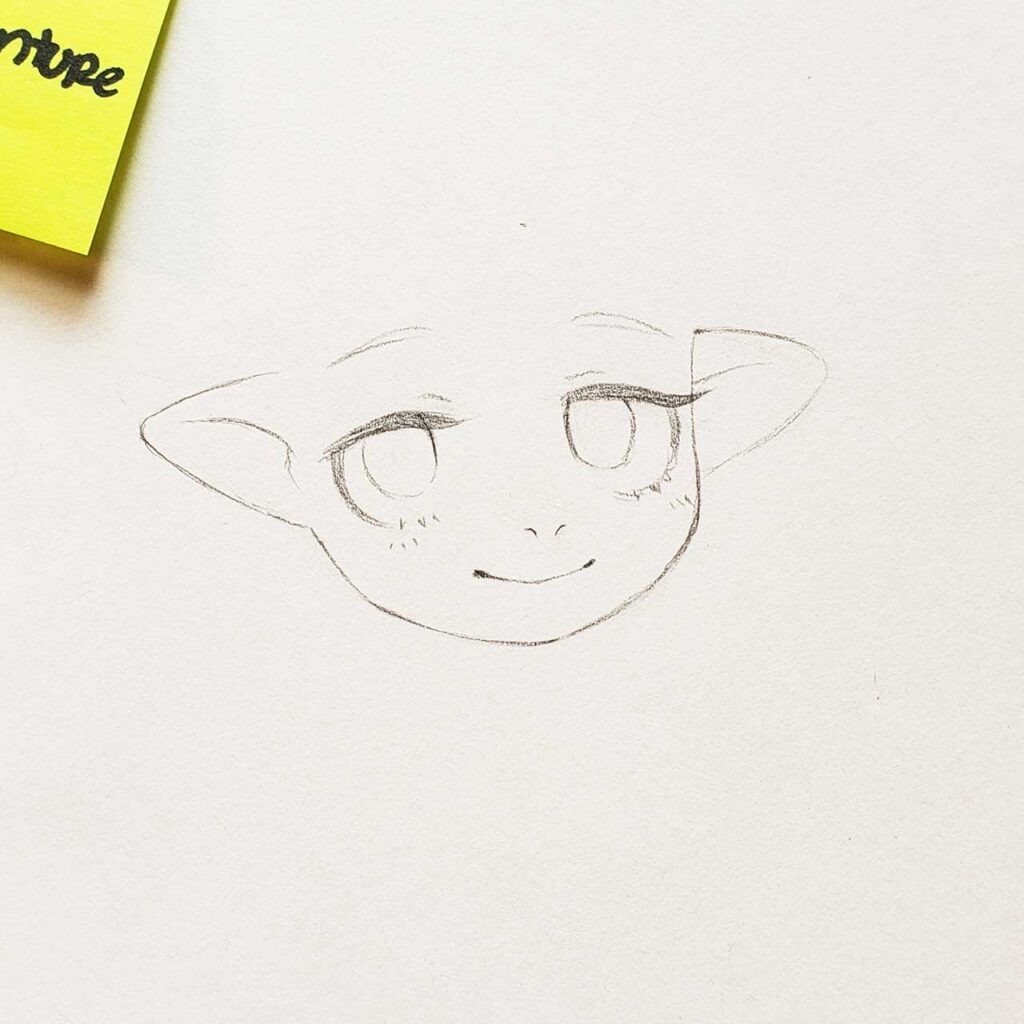
STEP 3: I decided that I wanted Sylvia to be an elf, so I gave her some pointed ears at around her eye level. I also gave her a small, rounded chin and added the rest of her face. Your character might have a longer head, a wider head, or even a monster head! If you prefer, you can draw out the face shape before adding the facial features.
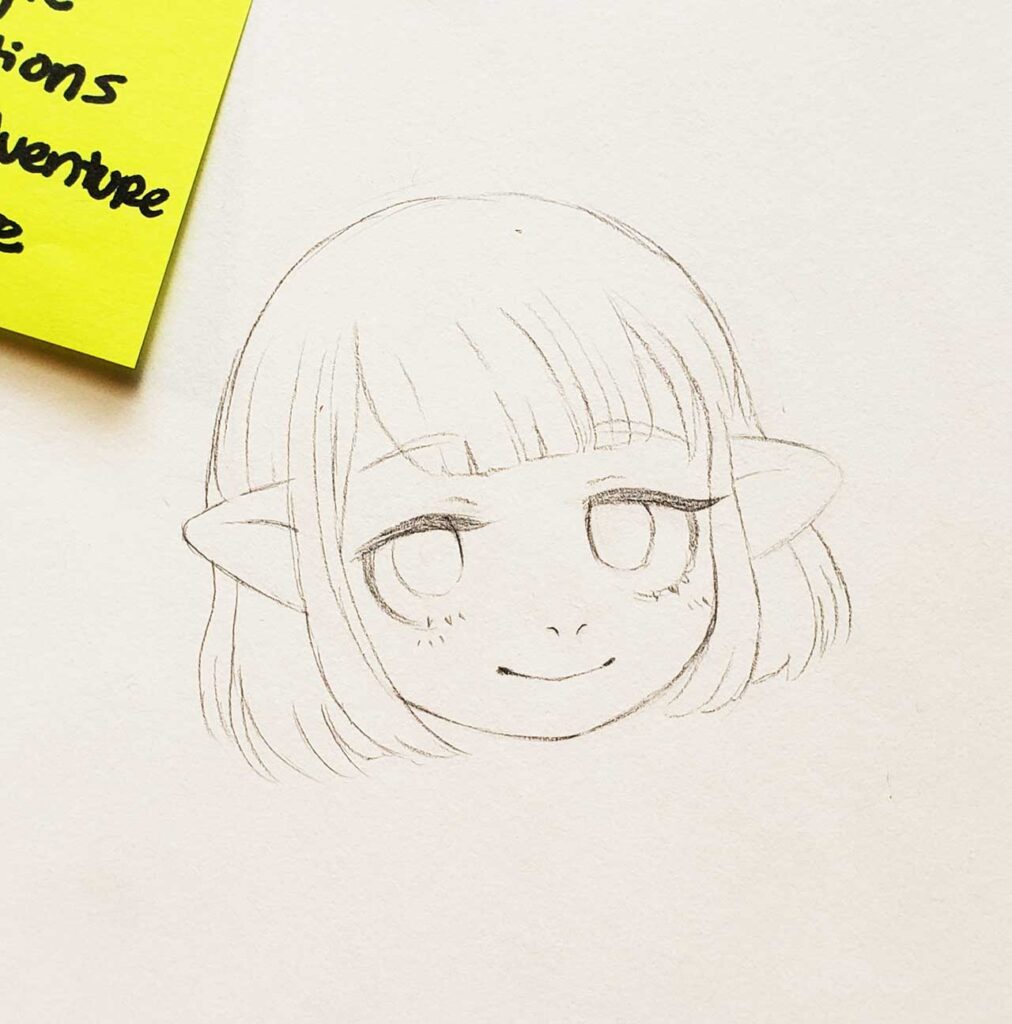
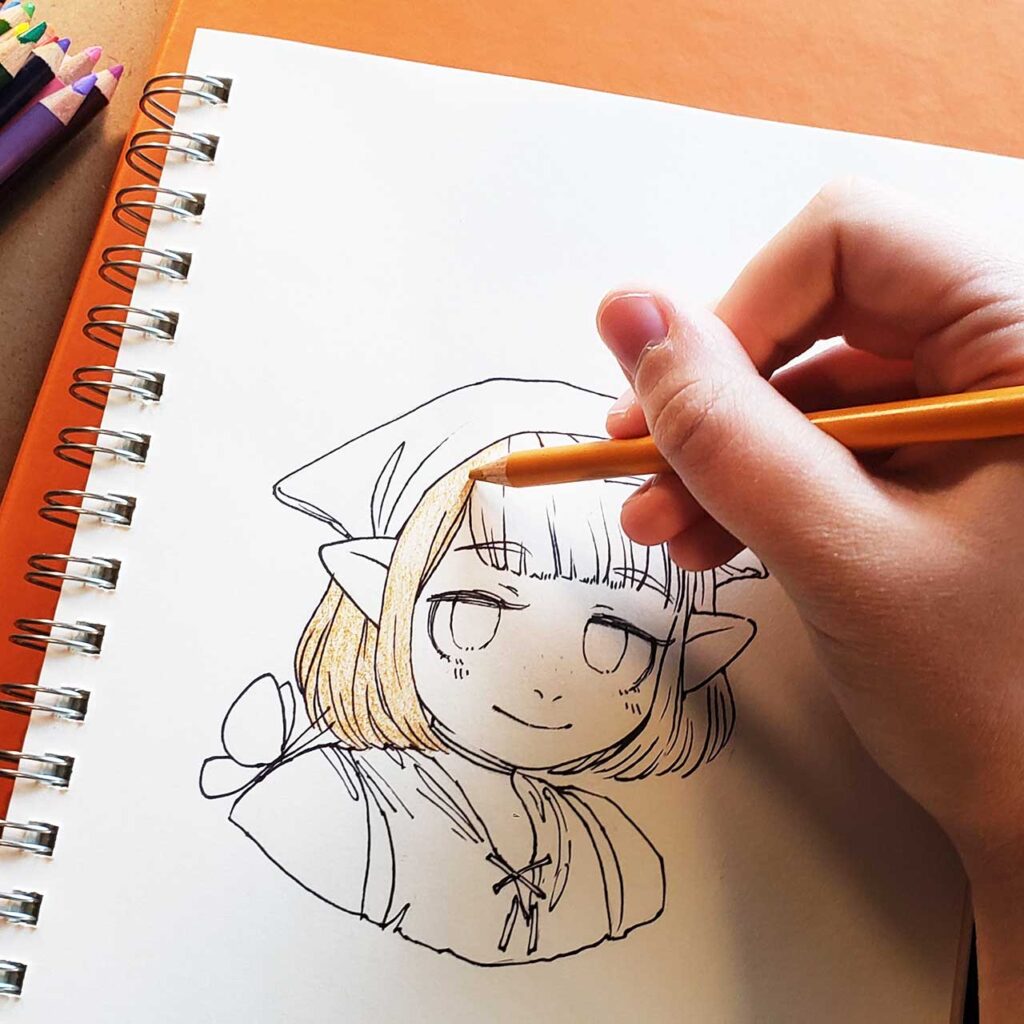
STEP 4: Decide what kind of hairstyle you want them to have.job or hobbies? If you choose long hair, will they wear it in a ponytail or braids to go exploring? If they are a princess or a knight they may have a more elaborate hairstyle.. Maybe the bangs cover one eye because your character is mysterious or maybe their hair is so long it touches the floor. Try to take note of how large or small your character’s ears are to decide if they will poke out of the hair or not. I chose shorter hair for Sylvia since I think longer hair might get in the way of her potion-making and adventuring. If your character’s hair is in front of or completely covers their ears, feel free to erase any parts that won’t show through, as the sides of the head.
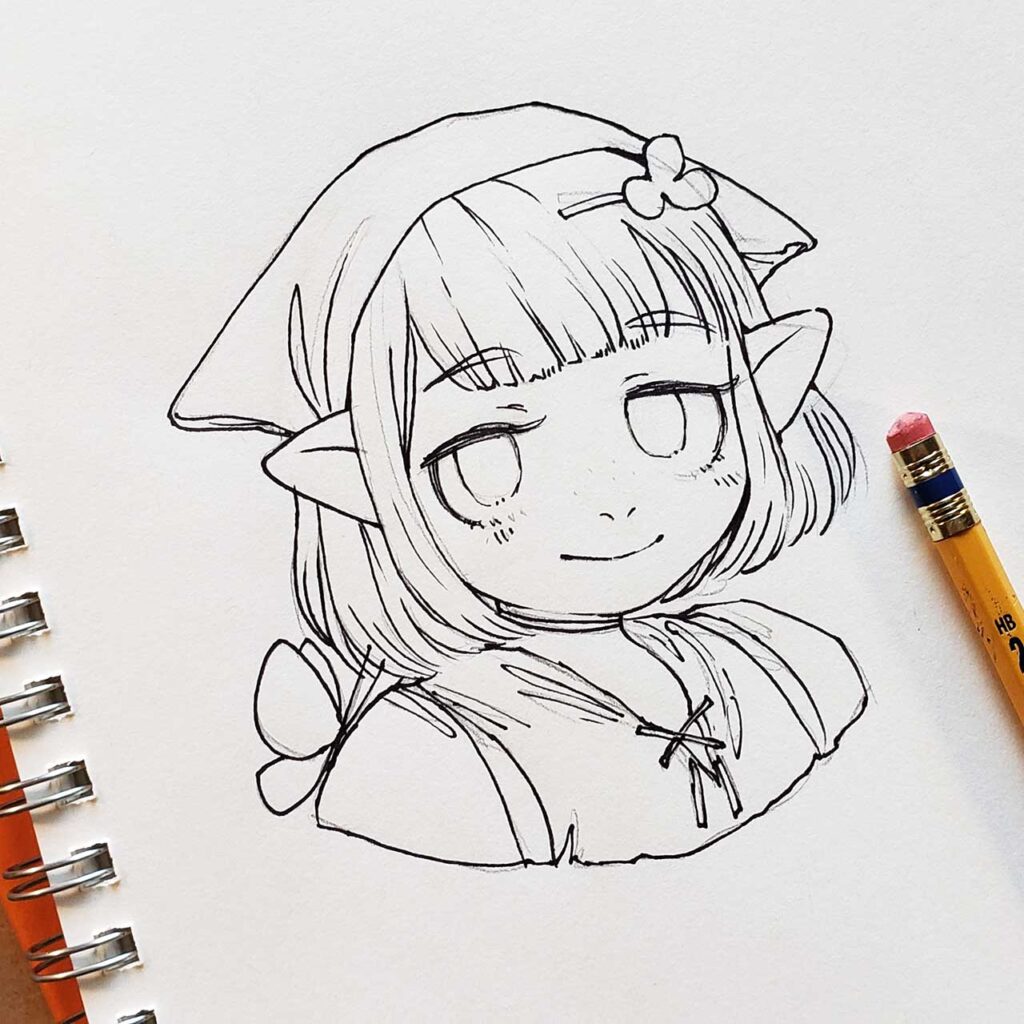
STEP 5: This is the fun part, deciding what clothes and accessories your character will have. Sylvia likes to make potions and adventure so I wanted to give her a bandana to hold her hair back and some backpack straps to show how she carries her stuff around. I added a little butterfly on her shoulder to show her love for nature and possibly imply that she is outside in this picture. Think about what your character does and what outfit or tools they would need. This is the time to put in any extra details you’d like; accessories, pins, buttons, clips, bows, glasses, earrings, and masks are just a few of the many options you could choose.
STEP 6: Now that the design is finished we can move on to the outlining! Grab your black pen or marker and trace over all of the lines you would like to keep on your picture. Feel free to add extra detail to the hair or eyes that you didn’t add before. The lines you make do not have to always connect to each other. For example, leaving some stray floating marks in the hair adds detail. When I outline I try to vary the amount of pressure I use to create thicker and thinner lines. I also like to add a bit of depth as some of the edges by making the corners thicker where two lines meet each other. Take your time on this step because your marks are permanent!
STEP 7: Now that you are done outlining you should let your ink completely dry. Depending on what pen or marker you used it might take some time to make sure you won’t smear your line work. Once everything is dry you can take your eraser and gently erase all of the pencil marks underneath the pen. After your drawing is all cleaned up you can add color with colored pencils. Remember to be creative and think outside the box when it comes to hair, eyes and skin! When coloring in my line art I try to be gentle and not bear down too hard so I can gradually build up the color in layers.
STEP 9: After I have my first layer of color down, I decided to add some shadows and shading to her face and clothes. Think about how the folds in the clothing create shadows in the fabric and press down a little harder to get a darker color. At this stage, I also added some tones to her face and created a lip with just color instead of lines.
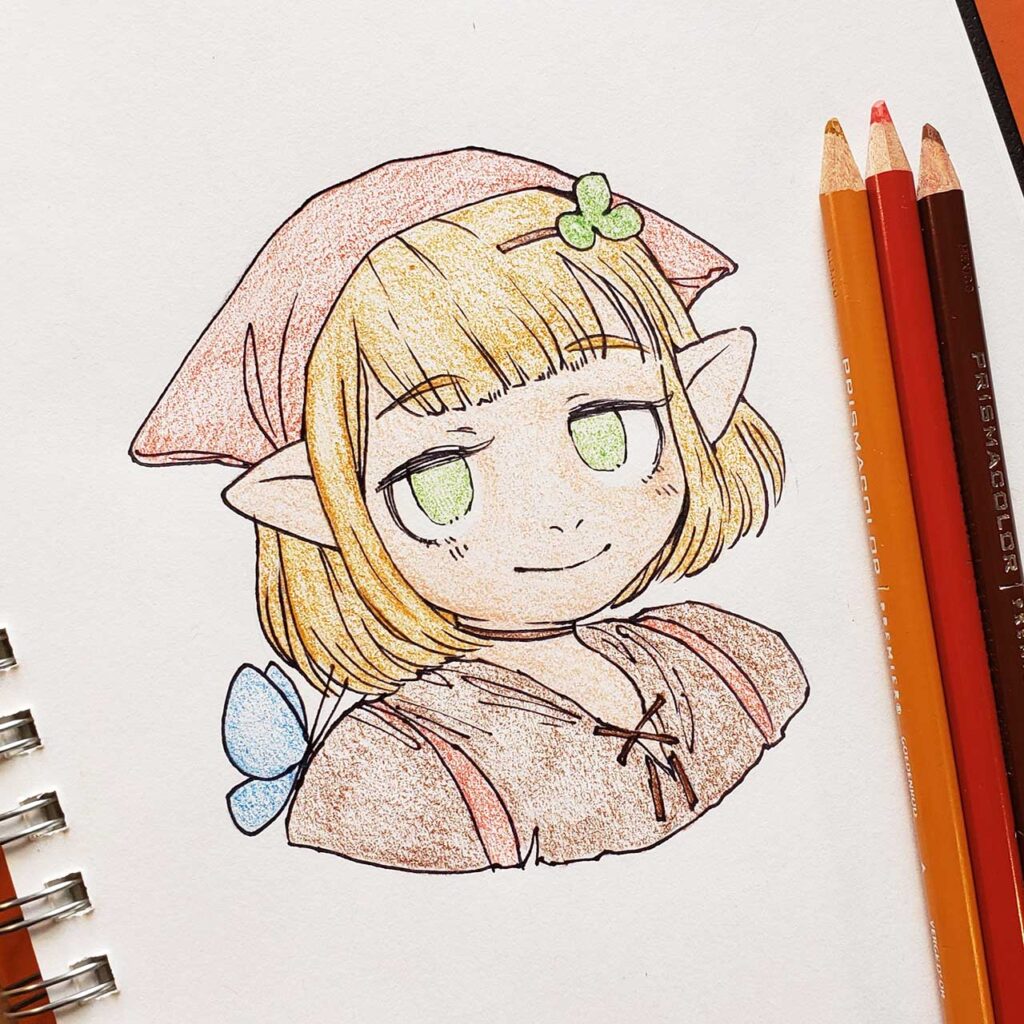
STEP 10 (OPTIONAL): Add some highlights to your character’s eyes, lips, or nose using white acrylic paint with a paintbrush or pencil tip. You can also add highlights to any shiny accessories.

STEP 11: Now that you have a completed bust of your new character it is time to come up with their backstory. Maybe they crash-landed on a magical island full of mysterious creatures and decided to tame them, becoming a creature rancher! Maybe they descended from royalty and are next in line to be king. You get to decide what kind of adventures or powers they have and even draw more characters to inhabit the world they live in!