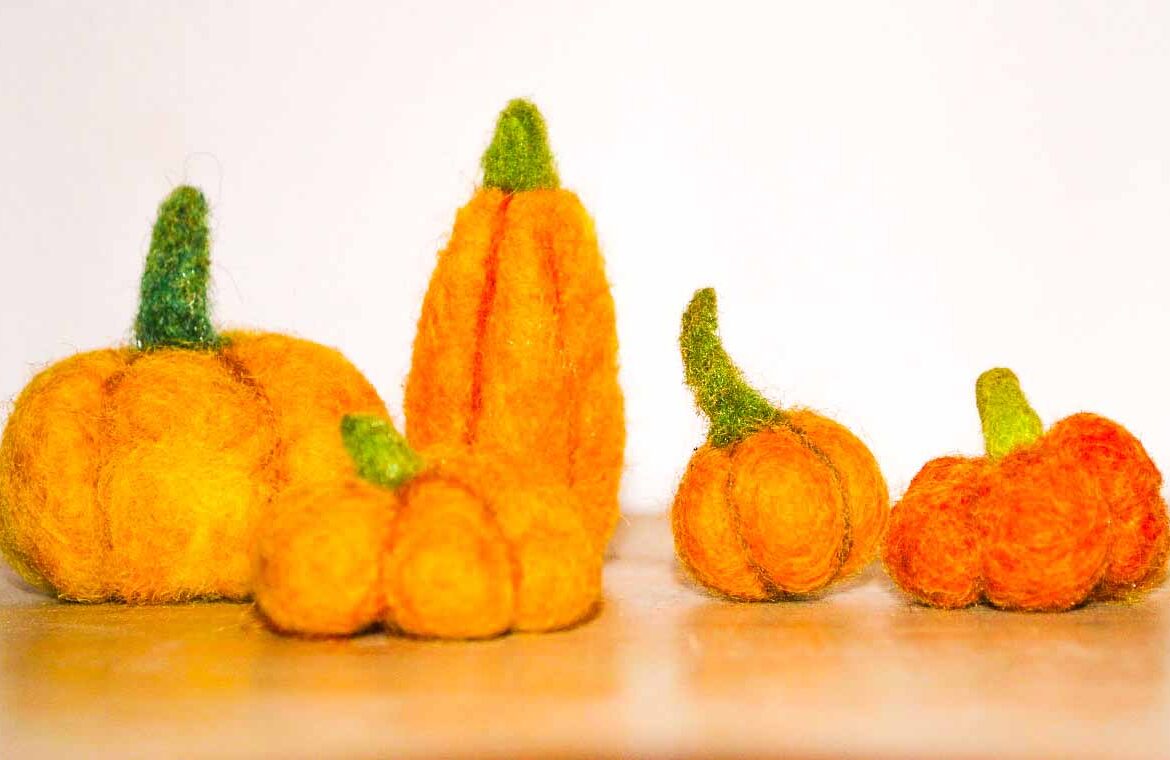
For our Felt Pumpkins, we chose oddly shaped and quirky pumpkins for inspiration. The less perfect your miniature pumpkins are, the more realistic they will look!
This fall project has “all the feels!” Fuzzy, wuzzy, and utterly addictive – wool felting is a process that happens to fibers like wool and hair with very little effort or manipulation!
Fun fact: because it doesn’t require the skill or tools of spinning/weaving to create, the process of felting evolved much earlier than any other textile process and is considered by many to be the first textile. Lucky for us!
Felting needles have tiny notches that push the fiber’s scales into one another, making a matted felt. You can also use reverse-felting needles to pull the scales. Needle felting is an ideal craft because it requires only a few materials, not much space to work, and is not a messy process. Before you know it, you’ll have a bounty of mini pumpkins to display.
A word of caution: felting needles are SHARP!! It’s very easy to poke yourself in the finger if you’re working too fast. Take your time – it’s not the speed, but the number of needle punctures that will felt your object. Some people like to tape their pointer fingers for protection before they start a project, but you may find you have less coordination that way. If you do poke yourself with a needle, clean the puncture quickly and grab a band-aid!
If you desire, you can use a felting needle tool or felting pen. For miniature projects like this, a felting needle tool, which holds multiple needles, is only useful to make the pumpkin’s base. A felting pen would be more useful if we were using single needles because it would give more control to hold onto the pumpkin with one hand while you hold the felting needle in the other.
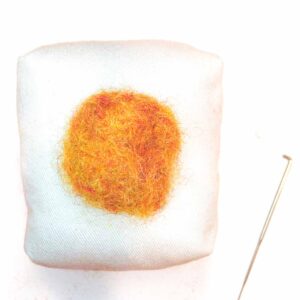
You can use a variety of felting mats made from wool or high-density foam. We are using a medium-sized pincushion stuffed with fiberfill. With any felting mat you use, it is vital that it has a certain amount of give and is thick enough that you won’t push all the way to the hard table surface below.
Make sure to rotate your work as you are felting. No matter which felting mat you choose, if you don’t rotate and move your work, it will start felting to your mat, and the mat may disintegrate!
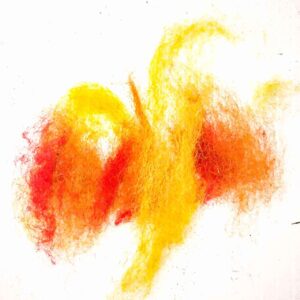
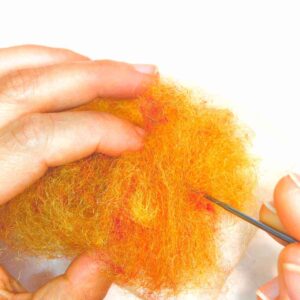
Step 1: Select colors for the pumpkin base. A real-life pumpkin has a blend of colors, just like a painting. Blending adds depth to your work, but you can also use a single color of roving it will still turn out beautiful. Select your roving colors and pull 2″ wide 5″ long hanks of each color and lay them next to one another so all of the strands are all going in the same direction as if they were being combed. This may seem like a lot of roving, but the process of felting makes these fibers very compact. The project will shrink by about a third of this size.
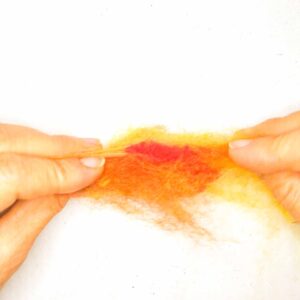
Step 2: Blend the colors for the pumpkin base. Roll all of the pumpkin base colors together so the strand ends are still combed, going in the same direction and can be held in your fingertips. Holding each end tight, pull your fingertips away from one another. Lay the lengths of the fibers on top of each other again and repeat the process until the colors are blended together.
Tip: If you like, you can use a comb for this process.
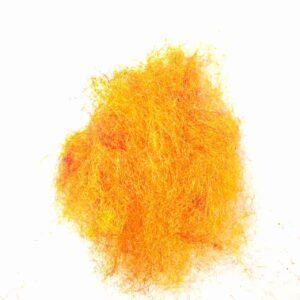
Step 3: Shaping the pumpkin base
Roll your blended wool colors in your hands like you would shape a piece of dough. The fibers can go in any direction now and will help in creating a nice strong mat.
Step 4: Fel the pumpkin base. Use your 91 mm needle to create the base of your pumpkin. Place your rolled roving on the felting mat and begin puncturing! Use one hand to hold and shape your work into a round pumpkin shape. The other hand will hold a felting needle.
Rotate and move your work so you can felt the whole piece as it begins to take shape. As you poke into your work, be mindful not to bend or break your needle. Try to keep your needle vertical and go up and down in the same direction. The name of the game is repetition, not speed.
It will take a while to create a firm felted piece, so go at your own pace and be careful not to hurt yourself.
Rotating your work serves two purposes: it will help you shape your object, but it will also ensure that you are not felting your work TO the felting mat. If an object stays in place for too long, it can potentially start disintegrating your felting mat (especially if your mat is high-density foam or made from fiberfill).
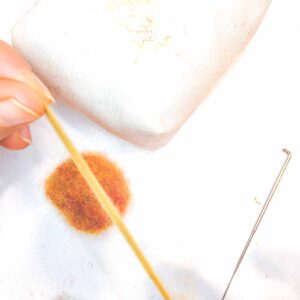
Step 5: Create the sections of your pumpkin. You will be using your 79mm fine-point needle to create the sections. Find a color of roving that compliments the base of your pumpkin and will highlight the sections. Separate a long, thin strand of roving that is about 1 mm wide.
Starting at the top center of your pumpkin (where the stem will be), use your 79 mm needle and start felting the fine line of roving into the base. Rotate the pumpkin base as you felt to create a dividing line of two hemispheres. Once you’ve joined the roving from beginning to end, pull away from the remainder of the strand.
Now grab another 1 mm strand of roving and felt into the pumpkin, which will create a dividing line roughly in quarters. Repeat this process once more, dividing the pumpkin base roughly into sixths. To add a little more visual interest, consider making the last sections asymmetrical.
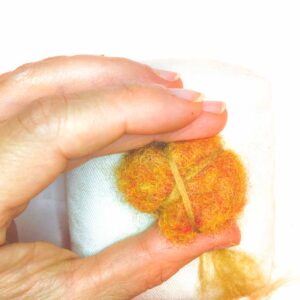
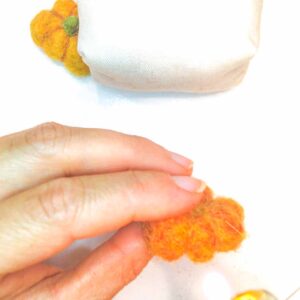
Step 6: Define sections of your pumpkin. Using your 79 mm fine point needle, trace over these lines of roving with your needle, further felting these sections. Eventually, these sections will pucker and felt, creating definition on the surface of your pumpkin.

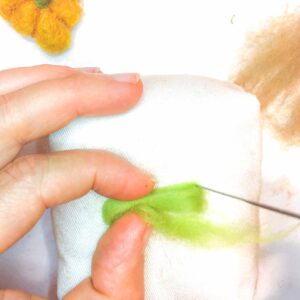
Step 7: Create the stem. You will be using your 91 mm felting needle for this process. Grab a strand of green roving that is approximately 1/4″ wide by 4″ long. You can blend several colors of green together to create the perfect stem color if you want.
Roll and fold this roving up to make a compact stem-shaped piece and start puncturing. This piece will shrink by a third of its size. Remember to rotate your work as you are felting.
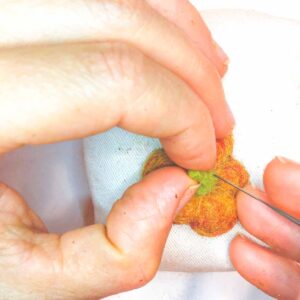
Step 8: Attach the stem. You will be using your 79 mm felting needle for this process.
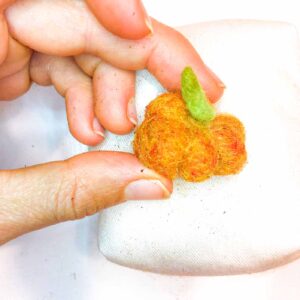
Place your felted stem at the pumpkin base’s center-top and poke around the stem’s base until the two pieces are joined.
Step 9: De-fuzz your felt. This process is optional if you prefer your needle-felted pieces less fuzzy. You can use scissors and trim the fuzz away, or use a lighter to scorch the loose, fly-away fibers. Take a lighter and lightly go around the object’s surface and singe the fibers. The smell of burnt hair is strong, but it goes away with time.
Tip: Spritz felted pieces with essential oils (or pumpkin spice!) to eliminate the odor, Brush off the singed fibers, then shape and squish the pumpkin until you have the look you want.

Make several more pieces to create your own pumpkin patch or give away these pint-sized pumpkins to family and friends! If you are in the creative zone and want more projects, visit our blog for more fall craft tutorials!
How long does this project take?
Everyone is different, but it takes me approximately 20-30 minutes to create one pumpkin.
Do students learn any specific skill from this type of activity? What will they gain from learning these techniques?
This is a project which will flex your fine motor skills and eye for detail! For this project, we will be working on color blending and color coordination. We will be creating three-dimensional objects, so we’ll need to consider how it looks from every angle.
I have a wool allergy. Can I use anything other than wool for this project?
Sheep’s wool is the most commonly used fiber for needle felting, but if you have a wool/lanolin allergy, you can purchase a rayon roving (made out of wood cellulose) to use as a substitute.
You can also felt polyester fiberfill, but it’s hard to dye, and more coarse.
How do I know when the project has been felted enough?
An excellent way to know if you have gone far enough with the needle felting process is by doing a “pull test” and seeing how firm the project is when squeezed. If you can still pull big wisps of fibers away from your project while you’re working or you can squeeze and squish the project without it bouncing back, your project isn’t felted enough. Give a few more minutes of the needle felting process with the 91 mm needle before moving on to the project’s finer details.
We are using sharp needles for this project; is it safe for kids?
Please use your discretion. I have done this project with students as young as seven. Felting pens have a safety feature that helps fingers from getting hurt. Just remember to go slow, pay attention, and keep your fingers holding the roving a safe distance away from the needle.