Instead, if you’re thinking, “I’ve got this, what do I need?”
Well then good for you, a do-it-yourselfer! Here is an outline of what we use when hosting a jewelry-making party for the BIG kids (we mean adults!).
We’ve approximated what is needed per guest in terms of jewelry making. Use your best judgment in terms of getting some extra help if you’re throwing a larger soirée for all of your gal pals!
Tools:
Wire:
Beads n’ things:
Practice! Adults all have individual tastes and tend to get overwhelmed with all the possible jewelry-making options, beads, and colors available to them. We’ve found it’s easier to have a couple of jewelry project samples ready that you’ve made yourself before the party to inspire your guests & to give you the practical know-how to assist your girlfriends at the party!
If you don’t have time to make jewelry in advance, pick out a few beaded jewelry examples that you like on Etsy or Pinterest and create a board of inspiration to share with your guests. Heck, you could invite them to do the same prior to the party and come ready with their own inspirational ideas.
Make ready-to-bead bracelets and necklace wires; 1-2 premade “set-ups” per guest. By doing so, you’ll create a relaxing flow where those who finish early can move into their next project. Zen? Yes, please!
With the practice you’ve gained, you can have fun teaching your friends to close the jewelry or make yourself available to finalize the jewelry pieces for your guests. Alternatively, place our easy-to-follow illustrated instructions on the table for guests to follow by themselves.
We all have such busy lives, and it’s often nice when someone else makes the decisions for us so that when we get together we can just be creative. That’s the vibe we’re going for here.
Decide in advance how many pieces each guest can make and let them know at the beginning of the party: “We are each going to make a single strand bracelet tonight, then we’re moving on to…” You choose… a movie? Book club discussion? More wine?

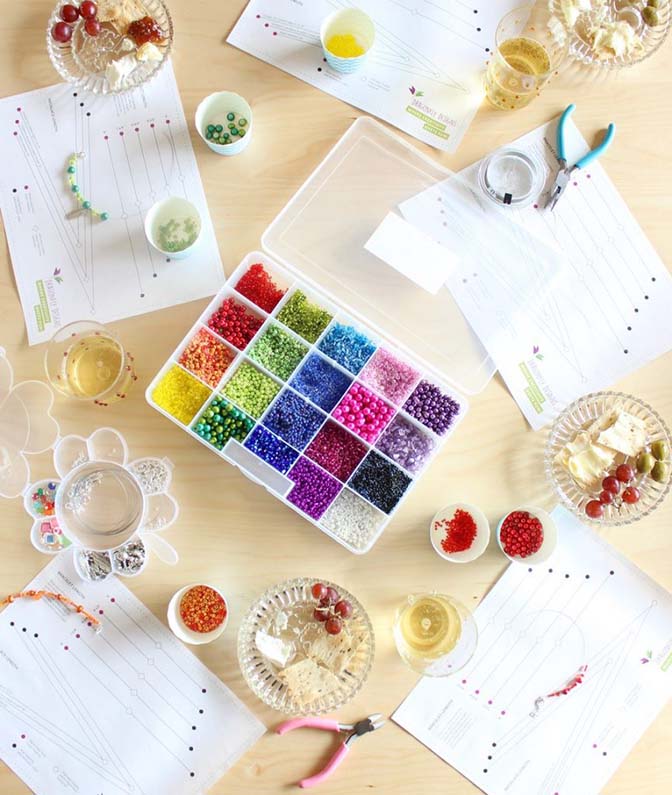
Place your color-coordinated bead organizers and 1-2 spoons for bead scooping into bead cups, on or near the table where you and your friends will be doing the beading.
Make sure each guest has a place to sit at a table with a printed measuring chart. Place sample jewelry in the center of the table.
Prepare light appetizers and drinks of choice to nibble/sip during the jewelry-making activity.
Have fun noshing and beading and Zenning (is that a word? We think it should be!) with your girlfriends.
At each place set:
Give clear instructions to all guests at the beginning of the party: “We are each going to make a bracelet tonight.” (If your party has a theme, name the bracelet after the guest of honor or occasion!)
Take a peek at the sample jewelry and any Pinterest board you’ve created for yourself as inspiration.
Look at the beads and when you’re ready, use the spoon to scoop your desired beads into your individual bead cups. You’re going to have extra beads when you’re done creating your piece. The bead cups allow you to keep the beads organized and easy to pour back into the correct cell of the bead organizer.
Help each guest measure their wrist and determine which size is best to use on the measuring chart. Then, select beads and begin beading!
After each guest has made as much jewelry as they are allowed, have everyone put away their extra beads, finalize each piece of jewelry, and wear their new handmade pieces.
We guarantee everyone will be excited and proud of their creations and look forward to showing them off to their families. Enjoy camaraderie with your girlfriends until it’s time to clean up and call it a night!
Incorporate glass beads, gemstones, and metal bead elements for interesting designs and textures.

Choose beautiful focal point clasps and incorporate metal spacer beads and a variety of bead textures, sizes, and natural stone elements. Add more than one strand to your design.

Choose a large beautiful bead or gemstone for the center accented with metal spacer beads on each side. Use two strands of flexible beading wire rather than one to create a double-strand bracelet or necklace, as shown in the samples below.

Create designs that are mostly metal beads with pops of colorful glass beads, pearls, and natural stones.

Feeling overwhelmed by the thought of tackling the craft store? Take advantage of our DIY Jewelry Making Kit that has everything you need to host a fabulously blingy beaded bash! Our kit includes all of the beads, clasps, gift pouches, measuring charts, bead organizers, charms, and easy-to-follow instructions you need to save time, money, and stress. All you need to provide are the venue, refreshments, and BFFs!