SPRING! It’s such a wonderful time of year. Bunnies, flowers, and little baby ducklings are all lined up faithfully following their mom to new adventures. And Easter, of course, with its gathering of friends and family, special treats, and old traditions. For many children (perhaps second only to Easter Egg hunts), egg dyeing is the season’s highlight. Eggs are such a wonderful canvas to decorate.
Did you know most artificial dyes contain chemicals such as petroleum? The good news is you can make stunning eggs with natural dyes you easily make from all-natural, everyday ingredients that won’t affect the taste. Use ingredients like beets, onion skins, or certain spices you can find right in your kitchen!
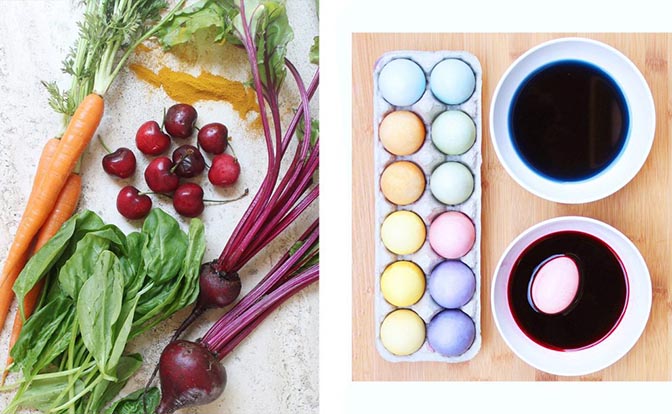
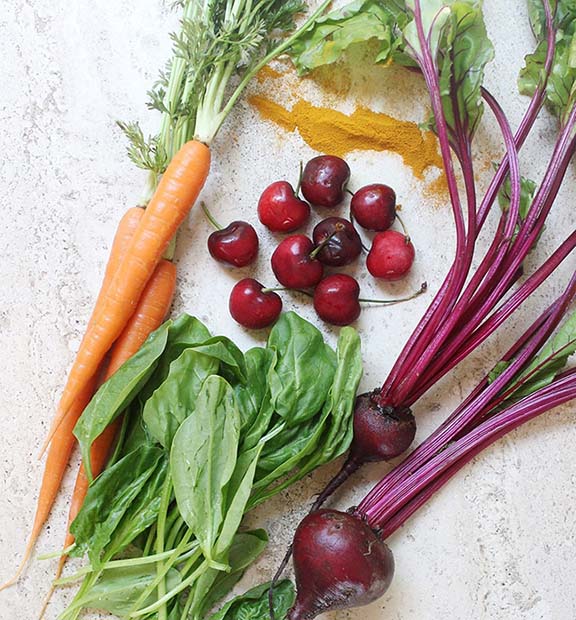
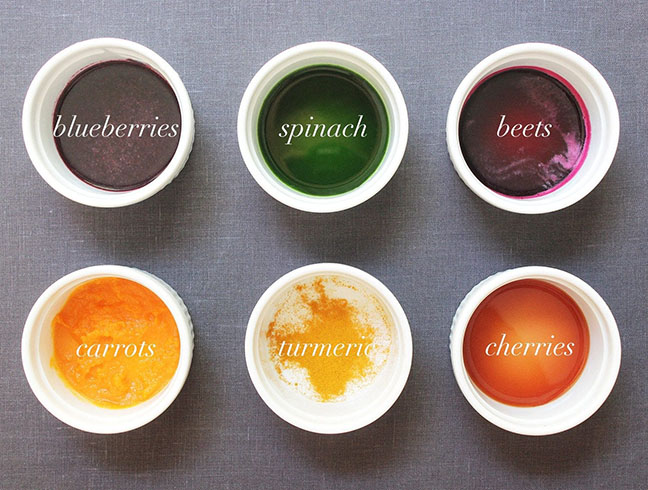
Using natural dyes for Easter eggs is just as fun as using traditional food coloring; watching your kids experiment with different fruits, vegetables, and spices is the added benefit. We tried at least a dozen foods, from carrots to turmeric, and found certain ingredients produced the most vibrant colors. However, don’t be afraid to try other ingredients. Pressed juices, teas, or even flowers can produce exciting hues.
Ready to try? Download our free guide for natural egg dyes, then gather the supplies you’ll need from around the house or the store.
For all projects:
For the dyes:
For added flare and patterns:
For silk-printed eggs:
Step 1: Boil two cups of the vegetable or fruit with two cups of water over medium-high heat. For the spices, use two tablespoons spice and two cups water.
Step 2: Once the ingredients reach a boil, reduce the heat to medium and simmer for 15 minutes. Pour the dye into a bowl and allow it to rest until it reaches room temperature.
Step 3: Discard any unreduced vegetable or fruit pieces and pour the dye through a fine mesh sieve. This step creates a smooth dye by removing any small pieces of vegetables or fruit and grainy pieces from the spices.
Step 4: Once the dyes are created, you’re ready for your hard-boiled eggs. We found the eggs need to be soaked in natural dyes longer than artificial dyes to produce our desired color. Five minutes per egg is sufficient for most dyes except the ones made with paprika and cabbage, which required soaking the egg for about an hour.
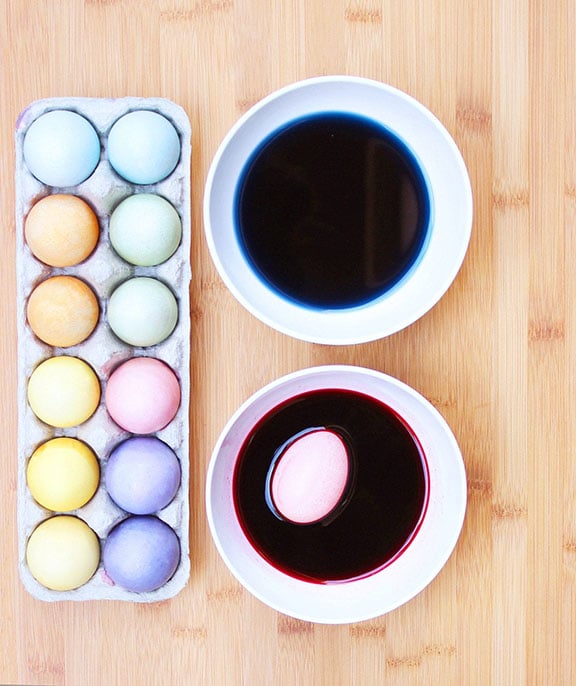
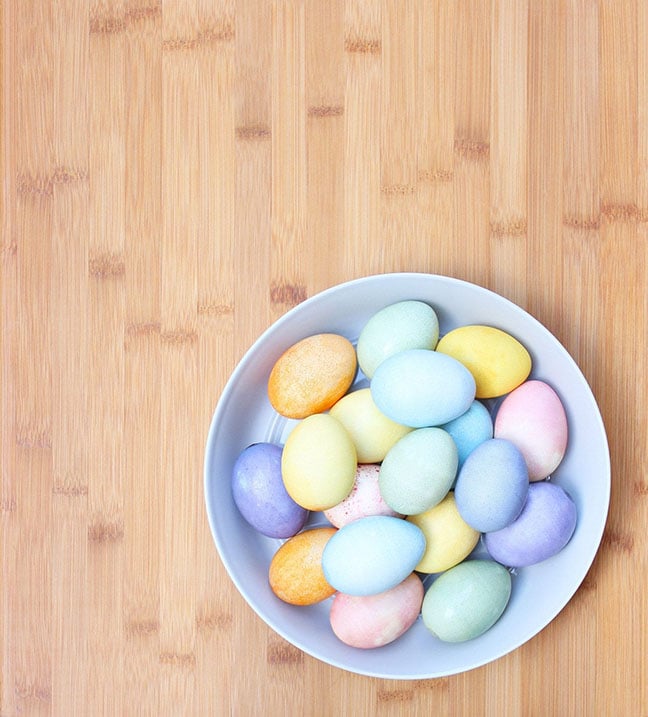
A sign of an excellent natural dye is an opaque color that looks much darker in the bowl. For example, our dye made from blueberries seemed almost black, but once on the egg, it produced a vibrant purple. You can also try mixing dyes to create new colors. We combined equal parts of the blueberry and turmeric dyes to make green coloring.
Once you’ve made your dye, try some of these neat tips and tricks to add different patterns to your eggs:
First of all, let’s not forget the good old white crayon. It’s a standard for a reason. The crayon can be great for writing text or simple shapes and designs. It’s perfect for younger children, who can turn even the simplest scribble into magic when the white is revealed through color.
Want a little more definition? More sophistication? Use masking tape or rubber bands to cover select portions of the egg before you put it in the dye. Get fancy! Spirals? Stripes? Rings or squares? Shaped stickers work, too. Let the egg soak in the dye for several minutes (again, natural dyes can take a little longer). Once you’re satisfied, pull them out and let them dry. It’s best to set them in an egg tray or similar stand so they do not roll around and smudge. Once dry, gently pull off the tape, sticker, or rubber bands and reveal your creation
Have you tried silk-printed eggs? It takes some different materials, and these eggs are not recommended for eating, but here is how to create these beauties.
Step 1: You’ll need silk fabric with patterns you want to copy onto the egg. (Think about old neckties, blouses, shorts etc. Goodwill can be a great source if you want to go on a hunt.)
Step 2: Cut the fabric, ensure you have enough to cover the egg, and cinch the silk with a rubber band or twist tie. Ensure the printed side of the silk touches the egg; the more snug the wrap, the more defined the print.
Step 3: Next, take your silk-wrapped egg and wrap it again in plain white cloth (an old sheet, t-shirt, or kitchen towel will work) and cinch it again. Repeat these steps for as much fabric as you have or as many eggs as you want to color.
Step 4: When ready, place the eggs in a pot (preferably glass, but not aluminum.) Fill the pot with water so the eggs are covered, and bring to a boil. Once boiling, reduce the heat and let it simmer for 20 minutes.
Step 5: Carefully remove eggs from the water using tongs or other utensils and let cool.
Step 6: Now for the fun part! After they’ve cooled, unwrap your eggs like little presents and reveal your showpieces!
Remember to use a non-aluminum pot (glass or enamel is best). Ensure your silk has good contact with the egg and is wrapped tight enough to hold that contact. Given the unknown nature of the dye in the silk, we cannot assume they are safe to eat. Let’s say they are for gorgeous decoration only.
Don’t forget to download our free guide to make dyeing these eggs even easier!