“If I had a rose for every time I thought of you, I’d be picking roses for a lifetime.”
– Swedish Proverb
Do you ever feel your life can be broken down into bag categories: hand, grocery, gym, kid’s sports, trash, lunch, work, cosmetic and travel? You can tell always tell where I’m going by which bag (or bags) I have on my arm. I have one for everything yet I still manage to forget my reusable shopping bags about 90% of the time! Do you ever find yourself paying for more when you have about a dozen in your trunk?! Sorry, Meghan Trainor, but it’s not all about that bass…it’s all about these bags! We can’t live without ‘em!
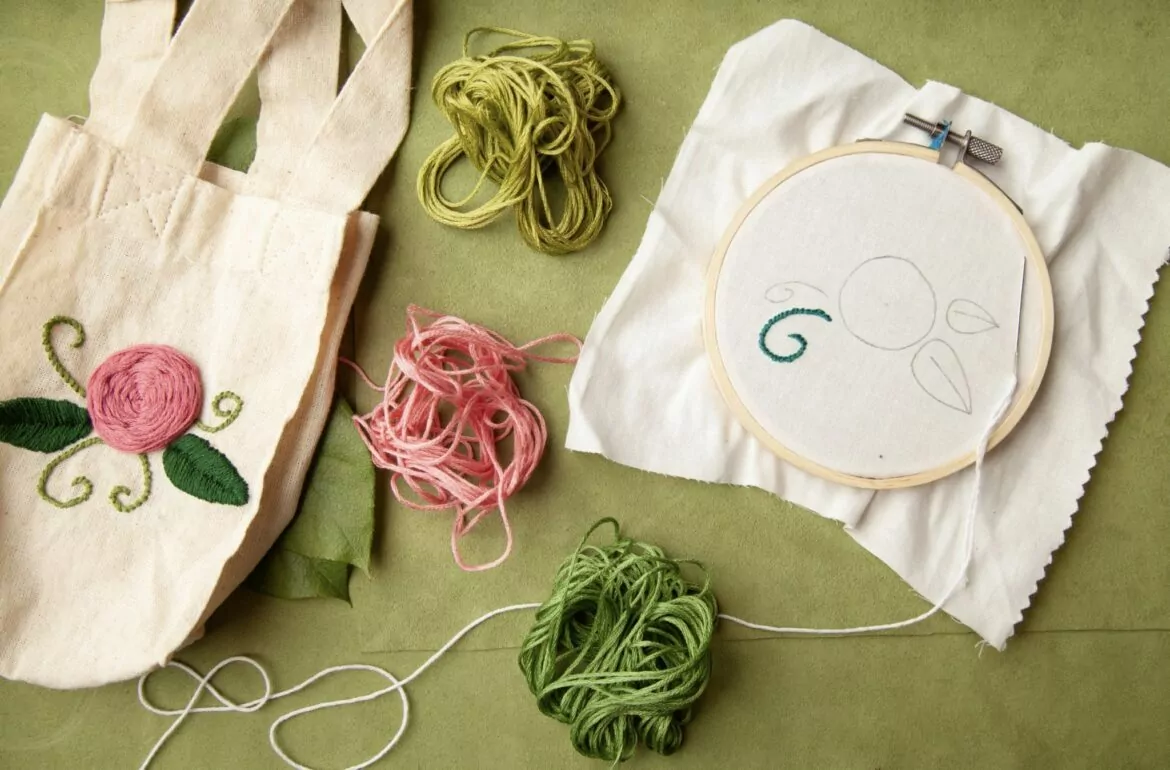
Here’s one that is so adorable we daresay it’s UNFORGETTABLE! Our DIY Rose Embroidered Bag is the perfect project if you have already have some sewing skills or if this is your first dabble with a needle and thread. It makes for a super thoughtful gift-within-a-gift. Use instead of a store-bought, paper gift bag or wrap for a creative, sustainable alternative! The recipient will think of you whenever she carries it (and we’re pretty confident it’ll go to the top of her bag rotation)!
– Canvas mini bag (or size of your choosing)
– Embroidery needle
– Embroidery thread
– Water soluble pen or tailor’s chalk
– Sharp scissors
– Needle threader

This adorable embroidery pattern utilizes 3 beginner friendly stitches to create an impressive look.


Out of the three stitches used in this design, the Fishbone Stitch is probably the most difficult, but it’s still beginner-friendly. While teaching this project to a mixed age group, I swapped out this stitch and replaced it with a felt applique leaf to save the little ones some headache.


Finish your next leaf, then move onto the rose!
The Woven Wheel stitch, also known as the Wagon Wheel stitch is probably the easiest way to embroider a realistic looking rose. Use embroidery floss for a dainty look, or if you’re doing this with children, use a thicker yarn for quicker results.
Step 1: Draw your design with a water soluble pen or tailor’s chalk. You need a center point, and a circle around it with a 1 inch diameter.
Step 2: Thread your needle and tie a knot at the end. Even when working with children, I prefer not to work on doubled up thread, as it looks a lot more elegant with just a single thread.
Step 3: Create 5 markings around the circumference of your circle, approximately an equal distance from each other.
Step 4: Come up from the back with your needle and stitch back down at one of the markings. Make sure you’re stitching a little bit over the edge of the circle to cover up the traced design.
Step 5: Coming up from that same point in the middle, create another stitch to the next marking around the circle. Continue until you have a five-pointed star.

Step 6: Come up with your needle to the front of your fabric, as close to the middle as you can.

Step 7: Now you’re going to start weaving your rose. Work clockwise around the circle, guiding your needle over and under the “legs” of the five pointed star. Make sure that you don’t accidentally skip one of the legs.


Step 8: If you run out of thread, pull your needle down through the fabric, and tie a knot on the back. When I work with children, I have them tie a knot onto one of the long stitches on the back. Then cut a new length of thread, tie a knot on the end, and continue where you left off.

Step 9: As you progress and add more and more thread, your rose is going to get puffier. If all your thread is concentrated in the middle, and starts puckering up, that’s a sign that you are pulling on the thread too tight while weaving – this happens with children a lot. Just relax, make sure you’re only pulling strong enough so that you pull all your working thread through, and your rose will lay nice and flat.

Step 10: When the lines of the five pointed star are all completely hidden under your woven rose, you’re done! Stitch down onto the back of your fabric, tie a knot and you’re done!

You can combine these three stitches to create as complex or as simple of a design as you wish!
Is your DIY Rose Embroidered Bag in full bloom? Did you make it for yourself or for a friend? Show us their reaction! We can’t wait to see – please share with us on social media!