
I never really contemplated a formal definition of a kite but since we’re broaching the subject here it is: A kite is a tethered heavier-than-air craft with wing surfaces that react against the air to create lift and drag. A kite consists of wings, tethers and anchors. Kites often have a bridle and tail to guide the face of the kite so the wind can lift it.
Huh. Well, yes I suppose it is that. It’s also a crazy lot of fun and excitement for people young and old! You don’t even have to be the one flying the kite to enjoy it. Think about the last time you were driving along and saw a kite in the air…who doesn’t light up for a moment and say “Look! A kite!”
Better yet, imagine a kite festival where there are dozens of multicolored kites of all shapes and sizes flitting about in the sky. There always seem to be a few awe-inspiring ones that swoop, twirl, and dance at the command of someone who obviously has mad kite skills we can only aspire to…and aspire we will! Join us in this latest project where we make our own kites! As always, there is plenty of room for interpretation and bling. Did someone say BEADS?!
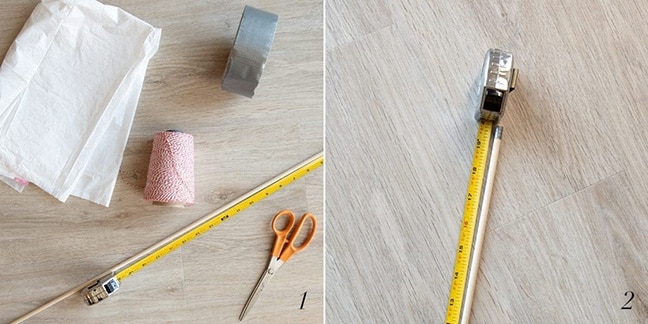
Step 1: Gather your supplies including the dowel, duct tape, measuring tape, plastic bag, scissors, and kitchen twine.
Step 2: Cut the “t” pieces for the kite. Measure 24 inches of the dowel and place a small piece of duct tape around the end you are planning to cut. This prevents the wood from fraying when you cut it.
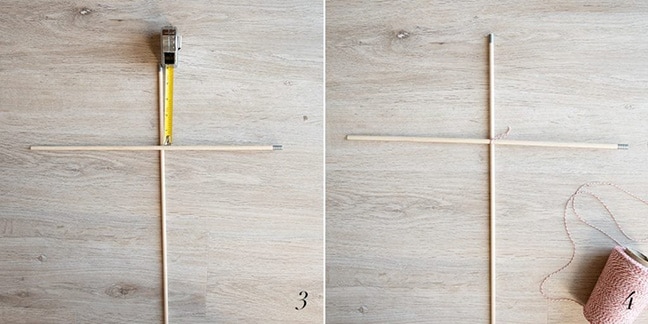
Use a handsaw (or a kitchen knife in a pinch) to cut the dowel. Follow this same process to cut a 16-inch piece of the dowel.
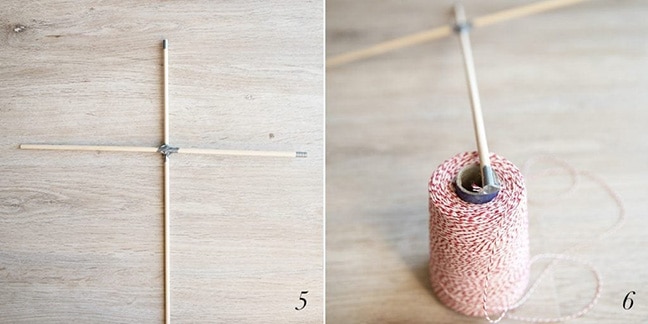
Step 3: Place the 16-inch dowel five inches below the top of the 24-inch dowel. The shorter dowel should be on top of the longer one.
Step 4: Secure the center of the two pieces with kitchen twine.
Step 5: Wrap the duct tape around the kitchen twine. This further ensures that your kite won’t snap or break in the wind.
Step 6: Starting at the bottom point of your kite, wrap the kitchen twine around the four points of the kite to frame it. Secure the twine by wrapping a small piece of duct tape at the end of each point.
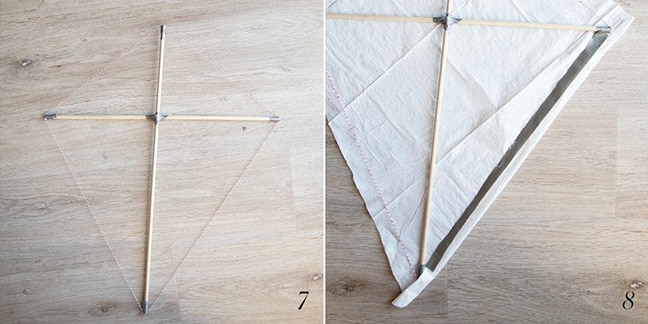
Step 7: You should now have the frame for your kite! Lay the plastic kitchen bag underneath your kite. Cut the bag around your kite leaving an inch on all sides. Fold the plastic bag up over the twine and secure it with a strip of duct tape. Continue this process for all four sides of your kite.
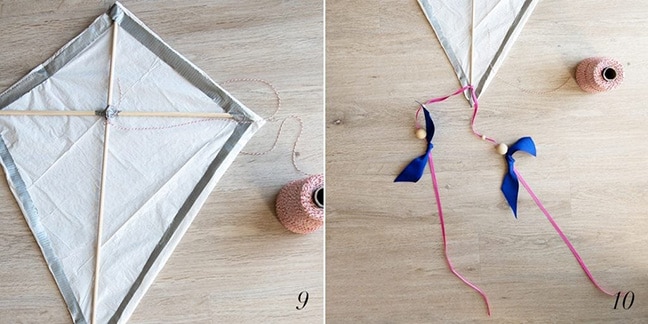 Step 8: Tie the kitchen twine to the center axis of the kite. Make sure you have enough string to allow the kite to fly.
Step 9: Add strips of cloth or beads to the end of the kite to help it stay balanced in the wind.
 Tips
TipsA 1/4-inch dowel works best for windy areas. If it’s not very windy where you are, a thinner dowel or even skewers taped together will be strong enough to support your kite. It might even be preferable to use a less heavy material so as not to weigh your kite down. Our dowel was 40 inches long, so it was the perfect size to make the 24 and 16-inch pieces. If your dowel is shorter, you will need more than one. (It’s also helpful to have an extra just in case you make a mistake with the cuts!)
Although it’s not the prettiest option, sturdy duct tape works better than Scotch Tape or glue to secure the plastic bag to the twine frame.
If your kite spins out of control in the wind, try adjusting the tail. Change the placement of the beads or add more so the kite has more weight. If you’re having a difficult time getting the kite off the ground, try removing weight from the tail or adjusting the placement of the kite string. Attaching the string to either side of the horizontal dowel will give the kite more support, and moving the string toward the top of the kite can help it to lift.