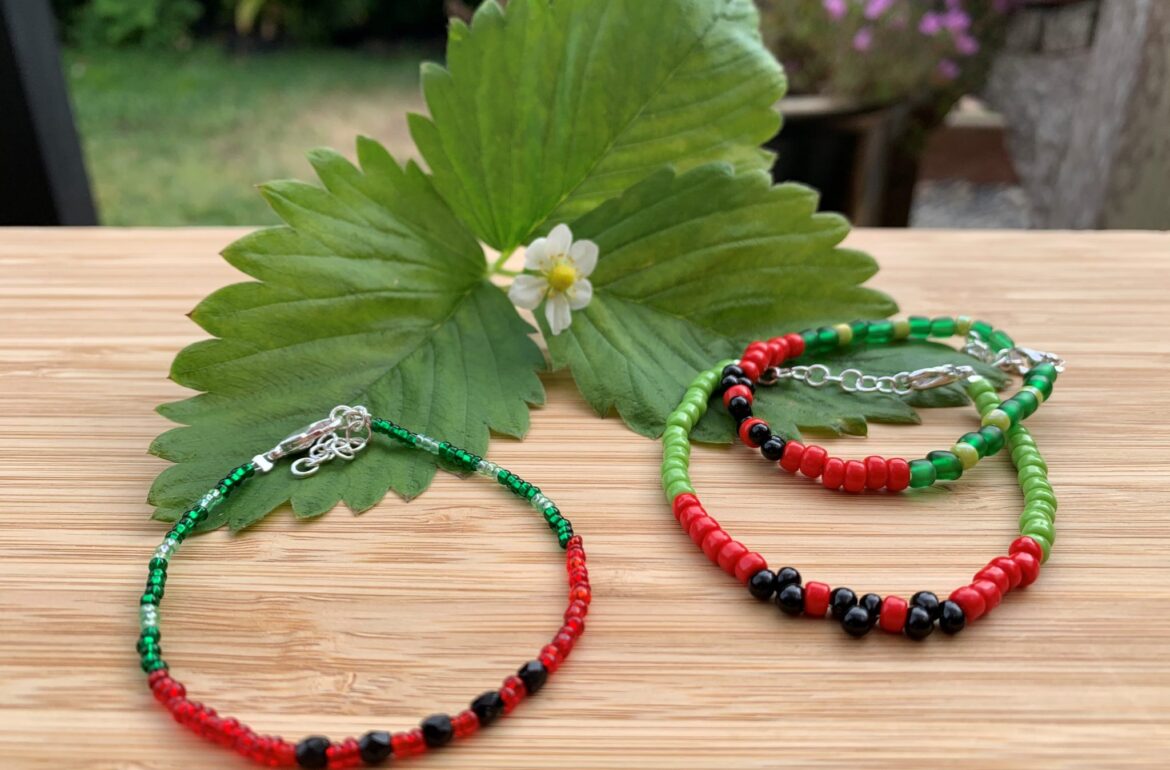
Simple, Sweet and Satisfying. What better words describe our latest watermelon focused summer project? Creating this watermelon bracelet is an easy way to fill some free time between camps, on weekends, or in any spare moment your kids have that could use some fun and healthy brain activity! Through a creative project like this, kiddos can practice concentrated focus and feel the satisfaction of project completion. Throw in some of these watermelon fun facts for some timely trivia:
1. Watermelons are considered BOTH a fruit and a vegetable! (While they contain seeds they are in the Gourd family.)
2. True to their name they contain 92% water.
3. While it’s not a trend we expect to take off stateside, the ENTIRE fruit is edible; in China the rinds are stir fried and eaten! Other places pickle the rinds or roast the seeds.
4. There are 1200 varieties of watermelon.
5. They are a great source of lycopene, an antioxidant shown to help reduce the risk of certain cancers.
6. A touchy subject in Oklahoma…watermelons are the states official vegetable however there have been formal legal disputes regarding its status as vegetable. (Probably best not to bring it up?)
7. An exceptionally sweet soft skinned variety has been cultivated for over 100 years by the Bradford family in South Carolina. (It’s soft skin makes it difficult to transport for sale–did someone say road trip?!)
8. Japan likes to grow them in molds to make them different shapes. Although they sell for a premium price, the restrictive growing conditions usually leave them inedible.
9. The largest watermelon on record was over 350lbs!
10. Seedless watermelons are hybrids not genetically engineered.
Unlike in school, you won’t be quizzed on this! Spend some quality time with your kids as they work on this wonderful watermelon craft!
This project is great for kids age 5 & up and can be a fun activity for a child’s watermelon themed birthday party!
– #6 pony beads green and red
– Black fringe beads for the seeds
– Bead cups
– Clasp (toggle, lobster claw and extension chain)
– Beading Wire – this is a special wire made for jewelry making; we like .014 diameter & 19 or 21 strands or similar
– Crimping pliers and/or chain nose pliers
– Flush cutting pliers
– Crimp beads
– Bead stoppers(optional)
– Measuring charts
– Bead Mats (optional) (velvet preferred as they keep beads from rolling around on tabletops)
Worried about gathering all the supplies? Don’t stress Dragonfly has got your back!
We’ve put together a Watermelon Bracelet Making Party Kit just for this project so all you have to work on are the steps!
1. Measure the bead string around your wrist and lay the string onto the measuring chart line that best matches your wrist size. 2. Cut the measured string 3” longer than the measuring chart line so you have extra beading wire to add the clasp and final extension chain. NOTE: adding a clasp adds approximately 1” to the final length. Make sure to account for the inside diameter of the bracelet; using larger beads takes up more space once it’s closed around your wrist.
3. For this bracelet, we’re going to leave both sides of the beading wire open and add the clasp & extension chain as the last step so we can make sure the middle is centered! Please add a bead stopper on one end of the beading wire so your beads won’t slip off. [You can also use a piece of tape if you don’t have beading wire]
4. Start by sliding on three black fringe beads, this is going to be the exact center of your bracelet, then slide on one red pony bead on each side of the fringe beads.
5. On both sides of the string, add one more set of three black fringe beads, then add six more red pony beads on each side of the bracelet.
6. Double check that the bracelet is still centered, then begin to string on the green pony beads.
7. Make sure that you’re measuring on the chart, as well as checking that the green pony beads are being placed evenly on the string so the red and black portion of the bracelet stays in the middle of the bracelet.
8. Once you have checked that the bracelet fits on the measuring chart, confirm that it fits on the wrist of you or your child, then you can begin adding the clasp.
9. Take a crimp bead and slip it over beading wire, add your clasp & loop beading wire back through the crimp bead only. Here’s a video to help guide you!
10. Repeat this step to add the extension chain on the other side of the bracelet
Let us know how this sweet party idea makes your child’s party more juicy, share with us on social media @hellodragonflyfun!
Need some Happy Mail? Join our mailing list to stay updated on the latest Dragonfly Designs news, latest offerings, and special promotions!
© 2023 Dragonfly Designs. All Rights Reserved | Proud to be a Woman-Owned Small Business